Tuesday 24 November 2015

Life Drawing #6


This is where we tried to draw movement as the model moved around.


Monday 23 November 2015

Textures that I made

These are the Textures that i made on Photoshops using multiple different images, which i have mashed together and customised to make them my own as well as fit the image and theme that I want for my battle arena. the ones that have been cut out are the individual textures for the weapons, that I have put over their UV snap shots which unfolded and made in maya an exported them to photoshop. Each of these textures were made individually on photoshops and then changed over to maya by saving them as a targa and and finding them using the hyper shader.


Monday 16 November 2015

Making models


My other project that i have to do is make a walkthrough on unity, this walk through must include code using C+, it has to have at least 3 different scripted events, as well i must download the standard assets from the assets store. This is because from the standard assets I will have to put the first person controller into the game, this will allow me to play the game that i will be making.

I will start of by modeling the map for the game, i used the one sheet that i made for ideas on the kind of layout that i wanted for my game. i decided to make multiple corridors and the make a stair case leading to different paths but only one is the real one. for this i simply just used cubes and planes to extrude out and and duplicate to make the layout

the next then i modelled where the rooms that the player can go into, all i needed to do was model one room and the when i put the model in unity i just duplicate the room and just move into position. Again i just used cubes, but i also modelled a sink in there as well.

The next thing i modelled was the bed, now with the bed i used the Ncloth tool to make the blanket as well as the pillow, i did this to make the blanket as well as the pillow as detailed and smooth as possible. 
the next thing i made was the lamps that were going to doted around the scene, these lamps are going to be lamps that look a different i made them in to a spiky flower shape by extruding a sphere. to be honest i made this by accident but i decided to stick to it. Im using these because my game is set in an asylum that has been taken over by hell. 
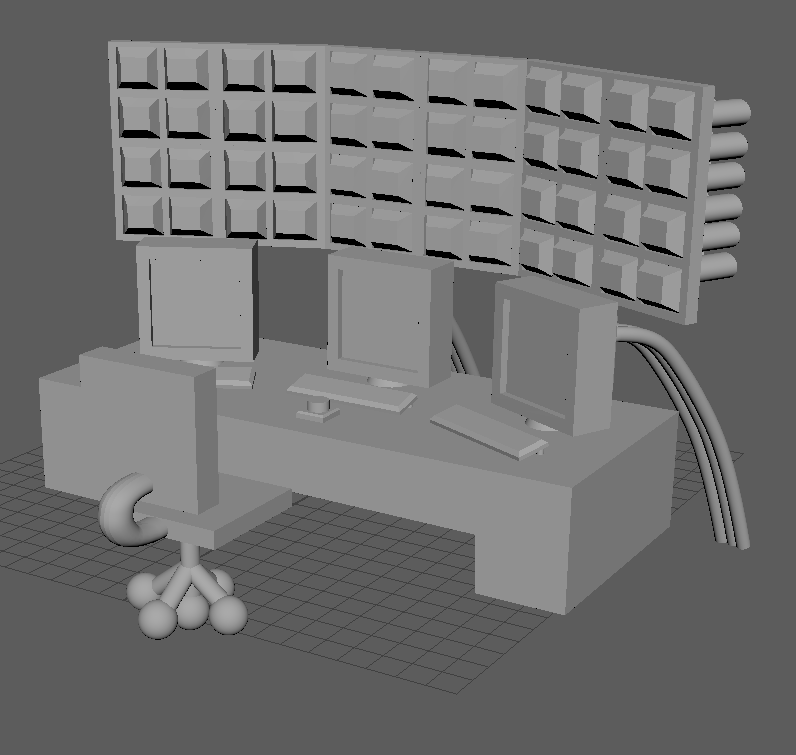
the next thing i made was the computer to be put into the security room as well as the security room itself, this is where the player will have to go at the start of the game to turn the power back on. I also then Made the doors which will be scripted so they rotate open when the player walks in a trigger as well some will be locked so you will need a key to open them. 


Finally the last thing that i modelled was the roof as well as the roof lights which i will make dim so they don't interfere with the glowing of the lamps as well as i will be coding them to flicker, this will give them a better effect visually and it will set the mood of the game. 


arena post texture


All the models for my arena are finished, and i have put them together, i have set out my arena, all the environment models as well as all the weapons. All that is left to do is texture as well as put into unity and add a few more things like a background. The image bellow is what the arena looks like with out any texturing being done. I will be getting some textures from google and then merging them with other as well as messing around with the levels, exposer as well as other setting as well as adding some detail with the paint brush. 

Monday 9 November 2015

Weapons


For the arena I have to make at least five different props, for example barrels, wagons, i have choses to create different weapons. i started off by modelling each weapon in its own maya file and then importing them into the arena to be UV Mapped and textured.  i decided to make a spear, axe, great sword, a normal sword and a double ended sword. 


the hardest part of making these weapons was actually making the shapes of the blade, i simply started of with a cube and changed the sizes to what i wanted. i then beveled the faces to make an edge on both sides. After that i used multi cut too put in new points, which then allowed me to move these points freely to get the shape that I wanted for the blades as well as some of the guards. After all the models were completed i imported them into my arena which was now complete apart from the texturing and some tweaking in unity. 


Saturday 7 November 2015

Tentacles


our assignment this week was to create something that has at least six tentacles, to tackle this task I started drawing a humanoid tentacle monster. I had decided to design an over weight monster, with a kind of infected look.
 
This was my first initial design, and around the main design I chose parts of the body to go into further detail, as you can see one of these parts was the head. I started off drawing a kind of swelling a boil on his head, but then decided to change it to one massive rock and tentacles that are holding it in place. I then decided to change to multiple rocks on his face and add more tentacles, by doing this it gave the look that the rocks were sinking as well as it made the skin of the monster look like it was alive and doing its own thing. Around the eye I drew dark parts coming out of the eye this made it look like it was corrupted and a sense that darkness is just oozing out. 

i decided to go for a normal skin colour, i chose this colour because i did not want to give the look that my monster is rotting or a kind of zombie but instead a living and growing organism. i also made the full arm covered by rocks to give it an overpowering look and i also made the other arm in a kind of shell with tentacles coming out of cracks. I call this monster Gluttony 

Monday 2 November 2015

Roots


After a bit of thinking i had decided that to make my arena more visually pleasing i would add roots on the ground, and then i would make these roots seem like they were coming out of the ground in all directions. As well as holding peaces of ground together, this would make the ground look like it has been ripped from earth.
I had never done curves like these before so i had to do some practice as well a lot of trial and error, after my tutor showed me how to use the correct curve as well as extruding easier i became much more confident in making these roots. i started making a few roots some single and some with more branches as well as different thicknesses and lengths.


 This is only an example of some of the roots I was able to achieve, i was also able to get these smooth curves by putting the taper down as well as using the smooth sculpting tool. this tool was a big help in taking care of any rough finishes.
i put most at the bottom of the ground and then made rocks and put the roots through the rocks to give the sense that they are whats holding them together

Sunday 1 November 2015

Zombie

This week our workshop was Halloween Themed, we were given a model of a woman in maya and the diffusion of that model to be put into photoshop. this is so we can change how the model looks and turn it to a zombie.

This is how the diffusion of the model looked like at the start of this assignment and now i had to change this to make it look like a zombie. which means make it look dark and very gruesome.

This is how the diffusion looks
like after I had completed the transformation, i had even taken some of the skin off and added bone so it looks like the skin had wasted away. The pictures on the bottom is how the model looks like in Maya while wearing the diffusion that i changed on Photoshop.