Monday 18 April 2016

Maya Model

For this terms project we have to make a statue to put into our battle arena. I have decided to make a gladiator. I have made the model on maya and then imported into zbrush to add detail. muscle and some cracks.


This is my maya model after I have uv rapped it and cleaned up the topology for my model, have also put in screen shots of the maps that I have baked using xnormal.
This is a screen shot of my model in Zbrush; I have added muscle and a lot of detail on to the model using the clay build up brush.

These are the screen shots of my build in unity with my model as an asset and all the textures put in place


Wednesday 13 April 2016

Life Drawing 17


 This was the last Life Drawing lesson of the year, and because of some complaints the model had to stay relatively clothed for this lesson. For the first time ever I had to draw clothed a clothed model; but it turned out to be very fun even though it was extremely difficult to get the clothing right and I also liked what had turned out. The shading on the dressing gown had turned out extremely well and I really liked it. In some drawings though u can clearly see that I had focused too much on the clothing instead of the models body.


Life Drawing 16


These are quick drawings of the models doing different positions, I also used Charcoal for the first pic of drawings while the second I used pencil.

In this drawing my focus was not the model so I got the basic outline as soon as I could not worrying about any detail so I could focus on the background around the model.

Life Drawing 15


This is where we used prospective in our drawings so the position where were to the model was important. The farther something was the smaller it would be while the closer it is the bigger it would be.

Life Drawing 14

This is another drawing where I used two different colours as well as two different media to draw in the hot and cold areas on the models body.


Both of these is where I tried different techniques that I would never try when I'm normally drawing.
I find both of these techniques extremely difficult, because if I lose focus al of it will go wrong.

Life Drawing 13

This was about a 5 min drawing which is where I did the outline as soon a s I could to try and focus on the shading more then anything.

In this one I tried again to only use shading and lighting to make the form for the body; even for the fingers I didn't use any out line only shading where the shadows and dark areas where on the models body.
These are Quick drawings of my class mates because the model was late so we decided to start by drawing each other in different positions.

Life Drawing 12

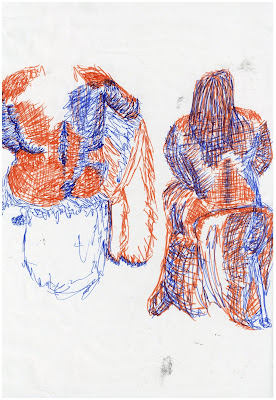
In this exercise we tried to use two different colours that signify Hot and Cold to draw the model; I used blue and red which are the typical colours for hot and cold. 

These are a series of the quick 2 min drawings where the model tries various positions.

This is one of my main drawings for this day which is were I tried only using shading and lighting to make the form instead of using out line.

Life Drawing 11


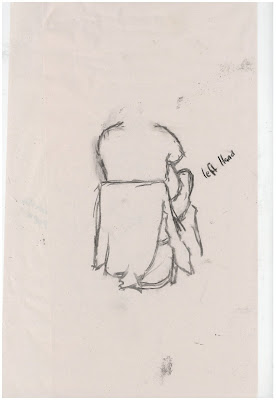
This was a quick exercise where we practiced using both hands the pen was my left while the Caracole was my right
This was one of the quick 2 to 3 min exercise trying out different poses.  

This was one of th elonger ones and  probably my finest piece of the day, I didn't use any outline in making this drawing I just used shading and lighting.

Crystal Tree

For this project we had to design a tree with character, not a tree with a face and clothes but a tree that shows character. I decided to draw a tree made out of ice in the dessert. I wanted it to look cold, I decided to do this on my sketch pad and then put it into Photoshop but the file corrupted.
This is the Mood Board that I used for inspiration and reference when drawing the tree.


Steam Gent

This was a steam punk project, We were allowed to do what ever we want as long as it fell under the steampunk genre; this means cogs, copper, metal and obviously steam.
I decided to design to do a steam punk gentleman robot, I started of my drawing on my sketch pad; first I did some rough sketches and then a finished sketch which I will then start over in Photoshop.


This is the final design, I gave it a wheel to be able to move around and give him better mobility; I gave him a top hat made out of pipes to make him more gentleman like. I also gave it glowing red eyes to show that it is a robot. most of his body is made up of pipes and I also started basing his chest of a an or car body. That is one of the reasons he has a head light on his chest.
I call him the Steam Gent.,

Bug Queen

This project was to design an insectoid, with this project the insectoid can be robotic, fantasy and so one, the only restraint is that we have is that we have to do a front, side and back view. We could also use Photoshop or traditional media; I had chosen to use traditional media.

This is the mood board that I used for reference, when I was drawing my insectoid, I decided to go with a female insectoid design; I used water colours to colour in my drawing.
This is the insectoid Queen, I gave her a larva underside to give her a look of vulnerability as well as the look like she's getting bigger.


Anatomy


For this project we had to do research on anatomy and skeletons and do a couple of sketches to show our research. We also needed to draw a full skeleton and label the different bones as well as draw a few certain bones.

Here I drew the skull, the hand and forearm as well as the spine. This is my drawing of a skeleton fully labled from fron, side and back view,


These are now my drawings of the images that I have researched of anatomy.


When I drew these pictures I tried drawing the anatomy in various positions because I wanted to draw the muscles in various positions as well as mix In some bone to show their position.


Tuesday 12 April 2016

Reaper Fighter


For this project I had to make a model come up with a design for a military sci-fi, then I need to make a 3D model in Maya of the design that come up with. After the 3D model is complete I then need to set up the lighting the model needs to be imported into Photoshop and then worked on to make I look good.

I started of drawing a speeder type of ship, but Then I realised that it doesn't really meet the brief, and it would be difficult to make this design look military. So instead I decided to draw another design that would be more military like and more bulky.
This is my final design that I will be using for reference when making the model in Maya, I went with a jet design but at the same time gave it helicopter blades in the wings to give it the ability to be able to hover in place. I also put in multiple weapons to make it more menacing and military like.


This is the finished model of my jet I also tried to go with basic shapes so I can get the body of the jet done and as accurate as I wanted it. I would then added the guns later in Photoshop.


This is the Reaper Fighter, this is the latest fighter developed for air and land superiority it is also capable of hovering in place. Being able to hover gives it capabilities of vertical take off and landings and the multiple engines gives it the power to break the sound barrier.

This is the final design, I used a style to give the neon glow to the parts of the ship and I did this to give it a more futuristic look to the design. I then got some scratched metal pictures and put them over the ship and wrapped the pictures around the jet to make it fit better. I wanted the jet to look like it was in maintenance so I added all the wires coming from the weapons and engines as well as got a picture of a hanger from the internet.